Issue #21 – Italian Pasta Salad
One perk of an office job is an endless amount of company luncheons and special functions that allow you to hone your cooking schools while having an entire department of taste testers (aka guinea pigs) at the ready. If your dish is good, there likely won’t be any left. If it’s not so good you’ll get the polite blank-faced, “no, this is really good. I’m just full,” and have a big container of leftovers to cart home.
My department is roughly a dozen people from varied backgrounds, so we usally get a wide array of great dishes for our almost monthly luncheons. We do a potluck luncheon each month for the birthday people, and the celebrants get to choose a theme (Mexican, backyard cookout, etc.) This is such a great idea because it alleviates the typical luncheon routine we tend to fall into.
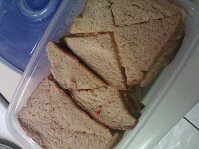
This month’s birthday folks at my job chose “backyard cookout” as their theme. I was torn between making pimento cheese finger sandwiches and trying pasta salad for the first time. Ultimately, I made both!
Italian Pasta Salad
One 16oz package multi-colored spiral pasta (or your favorite variety)
1/2 bag shredded (or matchstick) carrots
10.5oz salad tomatoes, halved
4 baby cucumbers, sliced into chips
2.25 oz sliced olives
1.5 cups Light Italian dressing
1.5 cups Creamy Garlic Caeser dressing
1 cup grated parmesean (if desired)
Cook pasta as you normally would, add vegetables, and stir. Slowly add in dressing, stirring thoroughly after each cup, so all pasta and veggies are coated. Cover and refrigerate until cool.
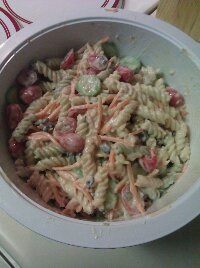
I only have an “after” photo of the pasta salad, because it didn’t dawn on me to get any during. My apologies! I also have included a photo of the pimento cheese sandwich triangles, just because they were cute and simple.
Issue #20 – Brown Rice
Hidey ho there, readers. It’s been awhile!
Forgive me for my extended absence. In the midst of learning to cook last year I got myself one of those nice full-time jobs then school started and POOF, there went absolutely all of my free time. I know, this is no excuse, but it happens. In more recent months I’ve had some health issues and had to withdraw from school for a bit, and really, no time like the present to get myself back on the cooking bandwagon, no?
I don’t have much up my sleeve, so my first few posts back will likely be very simple things I’ve been playing around with lately. Thank you all for bearing with me while my life took a busy turn.
Brown Rice
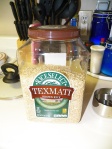
I’ve never successfully made rice, unless you count the boil in bag type, which most don’t. While boil in bag is very convenient and does offer brown rice, as well as some flavored varieties, if you’re low on money and need to cook the basics, picking up a 2-lb tub of brown rice at CostCo for $8 can’t really be beat.
I simply followed the directions on the container. I know, genius idea, right?! You’d think it would be easy, but no. The first time I made it the rice actually came out PERFECT. I was so amazed that I was texting and messaging all of my friends, “holy crap, I just made brown rice!” and they were like, “….ok….”.
Ingredients:
1 cup rice
2 and 1/4 cups water
1 teaspoon salt (if desired)
1 teaspoon butter (if desired)
I’ve made the rice using the following liquids: water, chicken broth, beef broth. All of them produce tasty rice, it’s just up to your preferences and what you’ll be pairing the rice with.
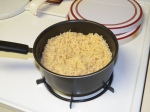
Bring water, salt, butter, rice, to a boil, reduce heat to LOW, cover, and boil for 45 minutes. The most important thing with rice, I have discovered, is to leave it alone! Once the lid is on, leave it on. Resist the urge to stir it or “check on it”. Rice can be alone for 45 minutes, it’ll be ok and won’t tear up the house or pee on the rug. Also, if you do have glass lids for your pots, look in and make sure there is liquid. The second time I made brown rice I ruined it because I didn’t have quite enough liquid OR I’d turned the heat up just a bit too high. The bottom layer was crispy and the rice grains didn’t fully cook. Learn from my fail.
What I like about this portion is it is 2-3 meals worth of rice. I usually half it up into containers and add some canned chicken or tuna and a bit of soy sauce, then I have two lunches for work. I also want to learn how to make beans and hope to one day pair rice and beans together. I’m very adventurous like that!
Follow @luchalibrarian
Issue #18 – Sweet Muffins
Now that I’ve been cooking for a few months, I find myself with a surplus of common ingredients (like flour, sugar, etc), though I don’t always know exactly what it is I’d like to make. During the week in particular I like to find things that are simple, quick, and use only the ingredients I have on hand. Makes things a lot easier.
Though today’s recipe was billed as one for “instant rolls” both the commentors on the original post and myself found this to be far more muffin-like and just sweet enough to not be considered a roll in any way. That doesn’t make them any less tasty or easy though!
If you’re like me and a big fan of breads (and those evil, evil carbs) give these Sweet Muffins a try. I don’t think you’ll be disappointed.
Sweet Muffins
The original recipe can be found here, and like I said, they’re dubbed instant rolls, but they’re more like little slightly sweet muffins that make for a great snack, or accompaniment to a meal. The addition of mayo to this sounds odd, but you don’t taste it at all and I think it helps with texture. My last note is that even though this recipe says it makes 12, the portions used here only make 6 nicely sized muffins, so adjust accordingly.
- 1 cup self-rising flour
- 3 tablespoons white sugar
- 3 tablespoons mayonnaise
- 1/2 cup milk
Preheat oven to 450 degrees F (230 degrees C). Grease muffin cups.
Mix flour and sugar together. Stir milk and mayonnaise. Fill muffin cups 1/2 full.
Bake for 10 to 15 minutes. Serve warm.
Follow @luchalibrarianIssue #17 – Apricot Turnovers
My friends Tina and J.C. got me a neat little book called “Just Three Ingredients” by Jenny White for my birthday. (Check it out here) A lot of the recipes in it are far beyond my expertise, even when they only require three ingredients. Shameful for me, I know. But there are also a number of them that I feel comfortable tackling.
Now that I’ve told you where I found this recipe, let’s get to it!
Apricot Turnovers
8 oz ready-made puff pastry (thawed if frozen)
4 TBSP Apricot preserves
2 TBSP confectioner’s sugar
Preheat the oven to 375F. Roll out the pastry on a lightly floured surface to a 10-inch square. Using a sharp knife, cut the pastry into four 5-inch squares. I accidentally bought puff pastry shells, which may have been a blessing in disguise. I simply rolled them out and they were perfectly sized for one turnover.
Place a tablespoon of apricot preserves in the middle of each square of pastry. using a pastry brush, brush the edges of the pastry with a little cold water and fold each square over to forma triangle. Gently press the edges together to seal.
Carefully transfer the turnovers to a baking sheet and bake for 15-20 minutes, or until risen and golden. Using a metal spatula, remove the pastries to a wire rack to cool, then dust generously with confectioners sugar and serve.
As you can see, I used a little too much apricot preserves in these and they spilled out. Best demonstration of the awesomeness of parchment paper ever! My pan didn’t get dirty or sticky, I just removed the turnovers and threw the paper away. No mess!
The turnovers were quite sweet, but really delicious and simple to make. Perfect for a weekend morning.
Follow @luchalibrarianIssue #16 – Chicken in Wine Sauce
Since I’m now employed permanently and full-time (Woohoo! Yes, much rejoicing!), one of my main concerns for meals is my at-work lunch and any snacks I may want. I’m trying to steer clear of the lure of the vending machines as well as eating out for lunch, even though there are half a dozen places nearly within walking distance of my office.
Instead I’m trying to make things that are easy to reheat, so I can take advantage of the fridges and microwaves the office supplies, and save money as well. This week’s recipe fit the bill! Though I would recommend, if you’re in a lunch setting where you don’t have real silverware, that you slice up the chicken before you go to work. Cutting through cheese and chicken with a plastic knife isn’t very easy.
Chicken in Wine Sauce
Yet again, I’m using a Paula Deen recipe. I saw this one and I’ll be damned if it didn’t include just about everything I like into one surprisingly easy recipe! You can find the original recipe here.
A few notes. Instead of stuffing I used Panko bread crumbs, because I had them on hand. The wine I used is more or less the only wine ‘ll drink, so you can use any white wine you prefer. I also am not positive my chicken cooked thoroughly this time. We have a gas stove/oven and I’m still trying to figure it all out, but just a word of caution to make sure your chicken is thoroughly cooked. Dinner shouldn’t end with a trip to the ER.
The individual chicken breasts were perfect to put in containers to take to work for lunch, as you’ll see from the picture. I made some rice and paired the entree and rice together for a nice at-work lunch. My only detractor for doing this is that the bread crumbs or stuffing weren’t crunchy after a stint in the fridge and microwave.
- 4 large skinless boneless chicken breasts
- 4 tablespoons butter, melted, plus more for casserole
- Kosher salt and freshly ground black pepper
- 6 ounces (about 8 slices) Swiss cheese
- 1 (10 3/4-ounce) can condensed cream of chicken soup
- 1/4 cup white wine
- 1 cup herb-flavored stuffing mix, crushed
Preheat the oven to 350 degrees F.
Add the chicken to a shallow buttered casserole and season with salt and pepper, to taste. Layer the cheese slices on top.
In a medium bowl, add the soup and the wine, season with salt and pepper and pour over the cheese. Sprinkle stuffing mix on top and drizzle with melted butter.* Bake for 45 minutes. Remove from the oven and serve. *Cook’s Note: If desired use more butter.
Follow @luchalibrarianIssue #13 – Italian Chicken & Pasta
You’ve been working all day, you have to eat, but the last thing you want to do is cook. What do you do that doesn’t involve getting asked if you’d like fries with that? You make up this delicious, quick, and easy Italian Chicken & Pasta, that’s what!
In about 20 minutes you can be feasting and getting on with whatever else you need to do before faceplanting for the night. That’s usually how my work nights go, at least.
Italian Chicken & Pasta
This is a very, very simple, yet tasty and filling recipe. All you need is chicken (I prefer white meat, but I’m sure it works just as well with dark or a mix), Italian dressing (you can go with regular, light, or fat free, but make sure it’s not the creamy kind), and pasta (I like small shells or bowties, but again, the type of pasta is your choice).
Step one, marinate your chicken in Italian dressing. This time around I only marinated mine about 5-10 minutes, but you could do it for an hour, or even longer.
Step two, start your pasta cooking and place the marinated chicken into a skillet, along with a bit of the dressing you marinated with.
Thoroughly cook the pasta and chicken. Drain pasta, put it into a bowl, then drain the chicken and place it on the pasta. For safety’s sake, do not use the dressing you marinated/cooked with on the pasta you’re going to eat. I don’t know if salmonella and such would live through the cooking process, but better safe than sorry, right?
Pour fresh dressing over the pasta, coating as thoroughly as you’d like. Voila! That’s it! I’ve never tried it, but I don’t see why this wouldn’t work with canned chicken, if you’re really crunched for time.
Follow @luchalibrarianIssue #12 – An All-American (American) Meal
Since July 4th is coming up, I thought I’d try my hand at a themed meal, of sorts. This week I’m going to tackle three All-American dishes – Meatloaf, Green Bean Casserole, and Apple Pie – and try to give them each my own little twist. Mmm, mmm! We have a lot of recipes and photos to get through this week, so let’s get to it!
Turkey Meatloaf Muffins
I haven’t always been a fan of meatloaf. Too dry, too much bread, too little flavor. That is until my ex made an amazing meatloaf using ingredients I’d never had before. The recipe he used is long gone, unfortunately, but I remembered the key items. I took the idea of making muffins from here. You can also use the recipe as a regular meatloaf or in mini-loaf pans. Make it the size that best suits your needs.
- 1 lb ground turkey
- ¼ diced onion OR 1 TBSP onion powder
- 3 cloves garlic OR 1 TBSP garlic powder
- 1/2 teaspoon ground thyme
- 1 teaspoon black pepper
- 1 teaspoon salt
- 1 egg
- 1/4 cup plain breadcrumbs (I used panko)
- ½ cup BBQ sauce (I used KC Masterpiece Honey)
- ½ cup light brown sugar
Preheat oven to 350, lightly spray a 12-cup muffin tin (or whatever pan you’ll be using).
Mix together turkey, onion, garlic, pepper, thyme, salt, egg, and breadcrumbs. Fill sprayed muffin tins equally with meat mixture. I found that using 1-lb of meat wasn’t enough for a 12-cup tin. I used 10 of them and my muffins shrank considerably, even though I used a lean turkey, so I recommend really stuffing each cup with the meat mixture.
Mix together BBQ sauce and brown sugar until it’s well mixed and liquefied. Place a little of the mixture on each muffin before cooking.
Bake for 30 mins.
Remove from oven, turn the muffins out of the muffin tin onto serving plate, enjoy!
Green Bean Casserole
Through this blog, I’ve discovered I’ll eat nearly anything when it has cream of mushroom soup and french fried onions in it. OMNOMNOM! I’d never tried to make Green Bean Casserole before and I actually don’t recall my mom ever making it for a holiday meal, either, which is strange. I really wanted to give this tried and true recipe a go, and here’s the results of my first attempt at this French’s recipe.
- 1 (10 3/4 oz.) can Cream of Mushroom Soup
- 3/4 cup milk
- 1/8 tsp. black pepper
- 2 (9 oz. each) pkgs. frozen cut green beans, thawed* (or canned)
- 1 1/3 cups Original or Cheddar French Fried Onions
Mix soup, milk and pepper in a 1 1/2 -qt. baking dish. Stir in beans and 2/3 cup French Fried Onions.
Bake at 350°F for 30 min. or until hot. Stir. Top with remaining 2/3 cup onions. Bake 5 min. until onions are golden. I used frozen cut green beans this time, and they’re a little… tougher than I expected? Still tasty, but I think canned beans, or perhaps French Cut may have been the way to go with this as far as texture goes.
Before we get to the apple pie recipe, I think it’s time for a musical interlude…
Apple Pie
Did you enjoy the musical number? Good! It’s always a wonderful day for pie!
My intent was to make pie pockets but when I started trying… it wasn’t pretty. I couldn’t get the pockets to close and they all kept tearing. Luckily the package of pre-made pie crusts comes with two, so I had a full bottom crust and pieced the top one back together, as you’ll see in the pictures.
This apple pie recipes comes from here. Like some of the comments state, once finished my pie was a little runny inside, even after sitting in the fridge. My bottom crust also didn’t thoroughly cook. Otherwise, the pie was delicious and quite easy.
- 1/2 cup sugar
- 1/2 cup packed brown sugar
- 3 tablespoons all-purpose flour
- 1 teaspoon ground cinnamon
- 1/4 teaspoon ground ginger (I couldn’t find ginger this time around)
- 1/4 teaspoon ground nutmeg
- 7 cups thinly sliced pared apples (I used Golden Delicious and cubed them in preparation for the pockets)
- 1 tablespoon lemon juice
- 1 Pastry for double-crust pie (9 inches)
- 1 tablespoon butter or margarine
- 1 egg white
- Additional sugar
In a small bowl, combine sugar, flour and spices; set aside. In a large bowl, toss apples with lemon juice. Add sugar mixture; toss well to coat. Line a 9-in. pie pan with half the pastry. Place apple filling into crust; dot with butter. Roll out remaining pastry to fit top of pie. Cut a few slits in top. beat egg white until foamy; brush over pastry. Sprinkle sugar on top. Bake at 375 degrees F for 35 minutes. Increase temperature to 400 degrees F and bake 10-15 minutes more or until golden.
Follow @luchalibrarian